
Purge Oracle Trace Files: A Comprehensive Guide
Managing Oracle trace files is an essential task for database administrators. These files, which contain detailed information about the operations performed by the Oracle database, can quickly accumulate and consume significant disk space. In this article, we will delve into the process of purging Oracle trace files, covering various aspects such as the importance of purging, the tools available, and best practices to ensure efficient management of these files.
Why Purge Oracle Trace Files?

Oracle trace files are invaluable for debugging and performance tuning purposes. However, they can become a burden when not managed properly. Here are some reasons why purging Oracle trace files is crucial:
-
Space Consumption: Over time, trace files can consume a significant amount of disk space, potentially impacting the performance of the database server.
-
Security Concerns: Trace files may contain sensitive information, such as SQL statements and user credentials. Keeping them for an extended period can pose a security risk.
-
Performance Impact: Large numbers of trace files can slow down the database server, as the operating system needs to manage them.
Tools for Purging Oracle Trace Files
Several tools and methods can be used to purge Oracle trace files. Here are some of the most common ones:
-
DBMS_SCHEDULER: This built-in Oracle tool allows you to create a job that automatically purges trace files at regular intervals.
-
Oracle Enterprise Manager: This comprehensive management tool provides a user-friendly interface for managing trace files, including purging and archiving.
-
Custom Scripts: You can write custom scripts using PL/SQL or shell scripting to automate the process of purging trace files.
Using DBMS_SCHEDULER to Purge Oracle Trace Files
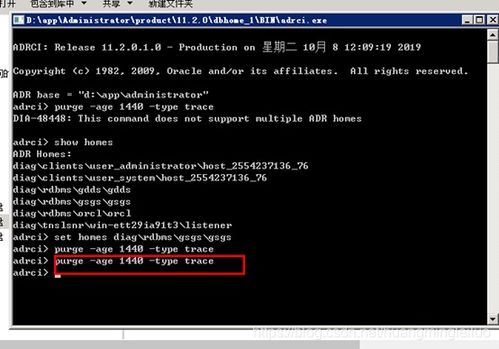
DBMS_SCHEDULER is a powerful tool for automating tasks in Oracle databases. To use it for purging trace files, follow these steps:
-
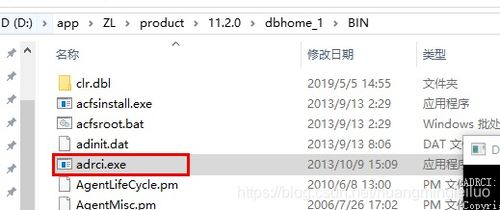
Connect to the Oracle database using SQLPlus or another database client.
-
Execute the following PL/SQL code to create a new job:
BEGIN DBMS_SCHEDULER.create_job ( job_name => 'purge_trace_files', job_type => 'EXECUTABLE', job_action => '/path/to/script.sh', start_date => SYSTIMESTAMP, repeat_interval => 'FREQ=DAILY; BYHOUR=1; BYMINUTE=0', enabled => TRUE );END;/-
Replace ‘/path/to/script.sh’ with the actual path to your shell script that purges trace files.
-
Modify the repeat_interval to suit your needs, such as ‘FREQ=WEEKLY; BYDAY=MON; BYHOUR=1; BYMINUTE=0’ for weekly purging.
-
Run the following command to enable the job:
EXEC DBMS_SCHEDULER.enable('purge_trace_files');Using Oracle Enterprise Manager to Purge Oracle Trace Files
Oracle Enterprise Manager provides a user-friendly interface for managing trace files. To purge trace files using Oracle Enterprise Manager, follow these steps:
-
Log in to Oracle Enterprise Manager.
-
Go to the ‘Database’ section and select your database.
-
In the left-hand navigation pane, click on ‘Performance’ and then ‘Trace Files’.
-
Select the trace files you want to purge and click the ‘Delete’ button.
Best Practices for Managing Oracle Trace Files
Here are some best practices to ensure efficient management of Oracle trace files:
-
Set appropriate retention policies: Determine how long trace files should be kept based on your organization’s requirements and security policies.
-
Monitor disk space: Regularly check the disk space used by trace files and take action when necessary.
-
Use automated tools: Utilize tools like DBMS_SCHEDULER or Oracle Enterprise Manager to automate the process of purging trace files


