
Burn ISO File to USB: A Comprehensive Guide
Are you looking to create a bootable USB drive from an ISO file? If so, you’ve come to the right place. Burning an ISO file to a USB drive is a straightforward process that can be done with a variety of tools. In this guide, I’ll walk you through the entire process, from selecting the right tool to ensuring your USB drive is properly formatted and ready to use.
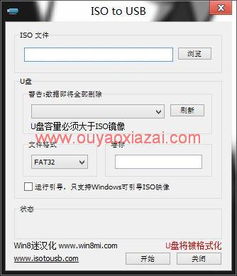
Selecting the Right Tool

There are several tools available for burning ISO files to USB drives. Some are free, while others require a purchase. Here are a few popular options:
| Tool | Description | Price |
|---|---|---|
| Rufus | Free, open-source tool that creates bootable USB drives from ISO files. | Free |
| Etcher | Free, open-source tool that supports a wide range of ISO files and USB drives. | Free |
| Windows Media Creation Tool | Free tool provided by Microsoft for creating Windows installation USB drives. | Free |
| PowerISO | Commercial tool with a variety of features for working with ISO files. | One-time purchase |
When choosing a tool, consider factors such as ease of use, compatibility with your ISO file, and support for your USB drive.
Preparation

Before you begin, make sure you have the following:
- An ISO file that you want to burn to the USB drive.
- A USB drive with enough storage space to hold the ISO file.
- The tool you’ve chosen for burning the ISO file.
It’s also a good idea to back up any important data on the USB drive, as the process will erase all existing data.
Formatting the USB Drive
Most tools will automatically format the USB drive for you, but it’s always good to double-check. Here’s how to format a USB drive using Rufus:
- Download and install Rufus from the official website.
- Insert your USB drive into your computer.
- Open Rufus and select your USB drive from the “Device” dropdown menu.
- Under “Partition scheme and target system,” select the appropriate option for your computer’s operating system.
- Under “File system,” select “FAT32” or “NTFS,” depending on your needs.
- Under “Cluster size,” select the appropriate option for your USB drive.
- Click “Start” to format the USB drive.
This process may take a few minutes, depending on the size of your USB drive.
Burning the ISO File
Once your USB drive is formatted, you can proceed to burn the ISO file. Here’s how to do it using Rufus:
- Open Rufus and select your USB drive from the “Device” dropdown menu.
- Under “Boot selection,” click on “Select” and navigate to the ISO file you want to burn.
- Click “Start” to begin the burning process.
Rufus will automatically check the ISO file for errors and then burn it to the USB drive. This process may take a few minutes, depending on the size of the ISO file.
Verifying the Bootable USB Drive
After the burning process is complete, it’s important to verify that the USB drive is bootable. Here’s how to do it:
- Insert the USB drive into your computer.
- Restart your computer and enter the BIOS or UEFI settings.
- Change the boot order so that your computer


