
Install Android File Transfer on Windows 10 Pro: A Detailed Guide
Are you looking to transfer files between your Android device and your Windows 10 Pro computer? If so, installing the Android File Transfer application is a straightforward process that can greatly simplify the task. In this guide, I’ll walk you through the entire process, ensuring that you have a seamless experience.
Why Use Android File Transfer?

Before diving into the installation process, let’s discuss why you might want to use Android File Transfer. This application is developed by Google and offers a reliable and efficient way to transfer files between your Android device and your computer. Here are some key reasons to consider using it:
- Easy to Use: The interface is user-friendly, making it simple to navigate and transfer files.
- Supports Multiple File Types: You can transfer various file types, including photos, videos, music, and documents.
- Secure Connection: The application uses a secure connection to ensure that your files are transferred safely.
Now that you understand the benefits of using Android File Transfer, let’s move on to the installation process.
System Requirements

Before you begin the installation process, make sure that your Windows 10 Pro computer meets the following requirements:
- Operating System: Windows 10 Pro
- Processor: 1 GHz or faster
- RAM: 1 GB (32-bit) or 2 GB (64-bit)
- Storage: 16 GB or more
- Graphics Card: DirectX 9 or later with WDDM 1.0 driver
Ensure that your computer meets these requirements to avoid any issues during the installation process.
Step-by-Step Installation Guide
Follow these steps to install Android File Transfer on your Windows 10 Pro computer:
- Download the Installer: Visit the official Android File Transfer website (https://www.android.com/filetransfer/) and download the installer for Windows 10 Pro.
- Run the Installer: Double-click the downloaded installer file to begin the installation process.
- Accept the License Agreement: Read the license agreement and click “I Agree” to proceed.
- Select the Installation Folder: Choose the folder where you want to install the application. You can either accept the default location or select a different folder.
- Start the Installation: Click “Install” to begin the installation process. This may take a few minutes.
- Complete the Installation: Once the installation is complete, click “Finish” to close the installer.
After completing these steps, you should have Android File Transfer installed on your Windows 10 Pro computer. Now, let’s discuss how to use the application to transfer files between your Android device and your computer.
Using Android File Transfer
Follow these steps to use Android File Transfer to transfer files between your Android device and your computer:
- Connect Your Android Device: Use a USB cable to connect your Android device to your Windows 10 Pro computer.
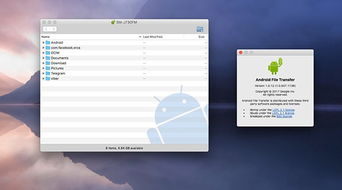
- Open Android File Transfer: Double-click the Android File Transfer icon on your desktop or search for it in the Start menu.
- Trust the Computer: If prompted, select “Always trust this device” on your Android device to allow the computer to access your files.
- Browse Your Files: The Android File Transfer application will display the contents of your Android device. You can now browse through your files and select the ones you want to transfer.
- Transfer Files: To transfer files, simply drag and drop them from the Android File Transfer window to your computer’s file explorer.
- Disconnect Your Device: Once you have finished transferring files, safely disconnect your Android device from your computer.
By following these steps, you should be able to transfer files between your Android device and your Windows 10 Pro computer without any issues.
Conclusion
Installing Android File Transfer on your Windows 10 Pro computer


